Algunos pasos del pintado del Aplastador
Small explanation on the painting process of Bloodcrusher
En esta entrada quiero explicar el proceso que he seguido para pintar el rojo, el dorado y el color carne del Desangrador. Las fotos las he puesto de manera que ayuden a la explicación pero no están en el mismo orden en que pinte la miniatura. Las fotos no son de las mejor calidad ya que las tome mientras pintaba y a veces no me salieron tan bien como yo hubiera querido.
In this entry I would like explain the process that I followed to paint the red, and gold of the juggernaught and the flesh of the Bloodletter. The photos are put in the order to support the explanation they are not in the same order I follow to paint the miniature. The photos have not the quality I would like because I take them while painting and sometimes I do not go as well as I wanted.
Rojo / Red
Para el rojo uso imprimacion negra
I started with black prime.
Primero aplico una capa de Mechrite Red, para que la capa no quede rugosa diluyo la pintura con agua. Yo siempre pinto con un pote de agua limpia para poder diluir la pintura. Esta es la capa mas importante y siempre es mejor hacer dos capas suaves que hacer una capa con la pintura poco diluida y te quede rugosa.
The first layer is of Mechrite Red. To have a smooth layer I diluted the paint. I always paint with a clean with pot filled of clean water to dilute the paint. This is the most important layer and it is better to make two soft layers than making a rough layer.

Después aplico un segunda capa de Blood Red, también diluido.
I apply a second layer of Blood Red

Con Devlan Mud hago las sombras y remarco los "cortes y arañazos". Solo lo aplico en las zonas que me interesa oscurecer. También lo aplico sobre los remaches.
Devlan Mud is applied to highlight the shades and the "cuts and scratches." I Only applied it in areas that I was interested in. I also apply it on the rivets .

Finalmente hago una iluminación con Blazing Orange y en las zonas que sobresalen mas en los remaches uso Fiery orange para remarcar aun mas la iluminación.
Finally I highlight the edges with Blazing Orange and the sharpest ones and rivets I also apply some Fiery Orange

Dorado o Laton / Golden or Brass
En este caso tambien uso imprimacion negra. Primero aplico una capa de Tin Bitz.
In this case I used Black Prime. First I paint with Tin Bitz

Hago una capa de Burnished Gold dejando las partes mas profundas en Tin Bitz.
I made a layer of Burnished Gold, I did not cover the Tin Bitz in the deeper areas.

Después hago un lavado con Devlan Mud. En este caso lo aplico de manera general y no soy selectivo.
Una vez el lavado se ha secado vuelvo a iluminar con Burnished Gold y finalmente ilumino los remaches y los bordes con Shinning Gold.
Then I washed the golden areas with Devlan Mud. I this case I was not selective.
Once the wash is completely dry I highlight with Burnished Gold and finally I apply Shinning gold on the rivets and edges.

Color Carne del Desangrador / Flesh Color of the Bloodletter
Para el Desangrador he usado imprimacion blanca. La base que he usado es Tanned Flesh color que GW ha dejado de vender. Igual que antes es importante que la pintura este diluida.
I primed the Bloodletter with white, and the based was done with Tanned Flesh, this color is not commercialized now. Important to dilute the paint.

He hecho un lavado con Baal Red.
I washed it with Baal Red.

Hago las luces con Dwarf Flesh y Elf Flesh usando otra vez Tanned Flesh para suavizar transiciones. Uso la pintura muy diluida intentando hacer las transiciones lo mas suaves posibles. Para que las transiciones queden suaves muchas veces voy haciendo mezclas sobre la marcha, no puedo decir la cantidad de las mezclas por que las hago a ojo incluso a veces lo hago sobre la misma miniatura.
I highlight with Dwarf Flesh and Elf Flesh and I used Flesh Tanned again to smooth the transitions. I used the paint very thin trying to make transitions as smooth as possible. Too smooth as possible the transitions I did some during the painting, I can not say the ratio of mixes because I did them depending on the result sometimes I did it on the same miniature.

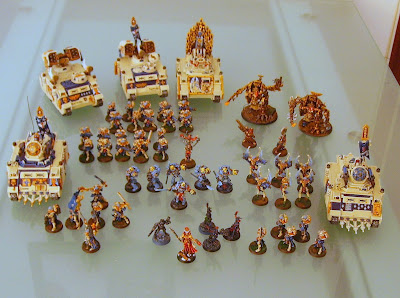
Finalmente os pongo una foto del resultado final.
A picture of the end result.

En esta entrada quiero explicar el proceso que he seguido para pintar el rojo, el dorado y el color carne del Desangrador. Las fotos las he puesto de manera que ayuden a la explicación pero no están en el mismo orden en que pinte la miniatura. Las fotos no son de las mejor calidad ya que las tome mientras pintaba y a veces no me salieron tan bien como yo hubiera querido.
In this entry I would like explain the process that I followed to paint the red, and gold of the juggernaught and the flesh of the Bloodletter. The photos are put in the order to support the explanation they are not in the same order I follow to paint the miniature. The photos have not the quality I would like because I take them while painting and sometimes I do not go as well as I wanted.
Rojo / Red
Para el rojo uso imprimacion negra
I started with black prime.
Primero aplico una capa de Mechrite Red, para que la capa no quede rugosa diluyo la pintura con agua. Yo siempre pinto con un pote de agua limpia para poder diluir la pintura. Esta es la capa mas importante y siempre es mejor hacer dos capas suaves que hacer una capa con la pintura poco diluida y te quede rugosa.
The first layer is of Mechrite Red. To have a smooth layer I diluted the paint. I always paint with a clean with pot filled of clean water to dilute the paint. This is the most important layer and it is better to make two soft layers than making a rough layer.

Después aplico un segunda capa de Blood Red, también diluido.
I apply a second layer of Blood Red

Con Devlan Mud hago las sombras y remarco los "cortes y arañazos". Solo lo aplico en las zonas que me interesa oscurecer. También lo aplico sobre los remaches.
Devlan Mud is applied to highlight the shades and the "cuts and scratches." I Only applied it in areas that I was interested in. I also apply it on the rivets .

Finalmente hago una iluminación con Blazing Orange y en las zonas que sobresalen mas en los remaches uso Fiery orange para remarcar aun mas la iluminación.
Finally I highlight the edges with Blazing Orange and the sharpest ones and rivets I also apply some Fiery Orange

Dorado o Laton / Golden or Brass
En este caso tambien uso imprimacion negra. Primero aplico una capa de Tin Bitz.
In this case I used Black Prime. First I paint with Tin Bitz

Hago una capa de Burnished Gold dejando las partes mas profundas en Tin Bitz.
I made a layer of Burnished Gold, I did not cover the Tin Bitz in the deeper areas.

Después hago un lavado con Devlan Mud. En este caso lo aplico de manera general y no soy selectivo.
Una vez el lavado se ha secado vuelvo a iluminar con Burnished Gold y finalmente ilumino los remaches y los bordes con Shinning Gold.
Then I washed the golden areas with Devlan Mud. I this case I was not selective.
Once the wash is completely dry I highlight with Burnished Gold and finally I apply Shinning gold on the rivets and edges.

Color Carne del Desangrador / Flesh Color of the Bloodletter
Para el Desangrador he usado imprimacion blanca. La base que he usado es Tanned Flesh color que GW ha dejado de vender. Igual que antes es importante que la pintura este diluida.
I primed the Bloodletter with white, and the based was done with Tanned Flesh, this color is not commercialized now. Important to dilute the paint.

He hecho un lavado con Baal Red.
I washed it with Baal Red.

Hago las luces con Dwarf Flesh y Elf Flesh usando otra vez Tanned Flesh para suavizar transiciones. Uso la pintura muy diluida intentando hacer las transiciones lo mas suaves posibles. Para que las transiciones queden suaves muchas veces voy haciendo mezclas sobre la marcha, no puedo decir la cantidad de las mezclas por que las hago a ojo incluso a veces lo hago sobre la misma miniatura.
I highlight with Dwarf Flesh and Elf Flesh and I used Flesh Tanned again to smooth the transitions. I used the paint very thin trying to make transitions as smooth as possible. Too smooth as possible the transitions I did some during the painting, I can not say the ratio of mixes because I did them depending on the result sometimes I did it on the same miniature.

Finalmente os pongo una foto del resultado final.
A picture of the end result.


Comentarios
Publicar un comentario